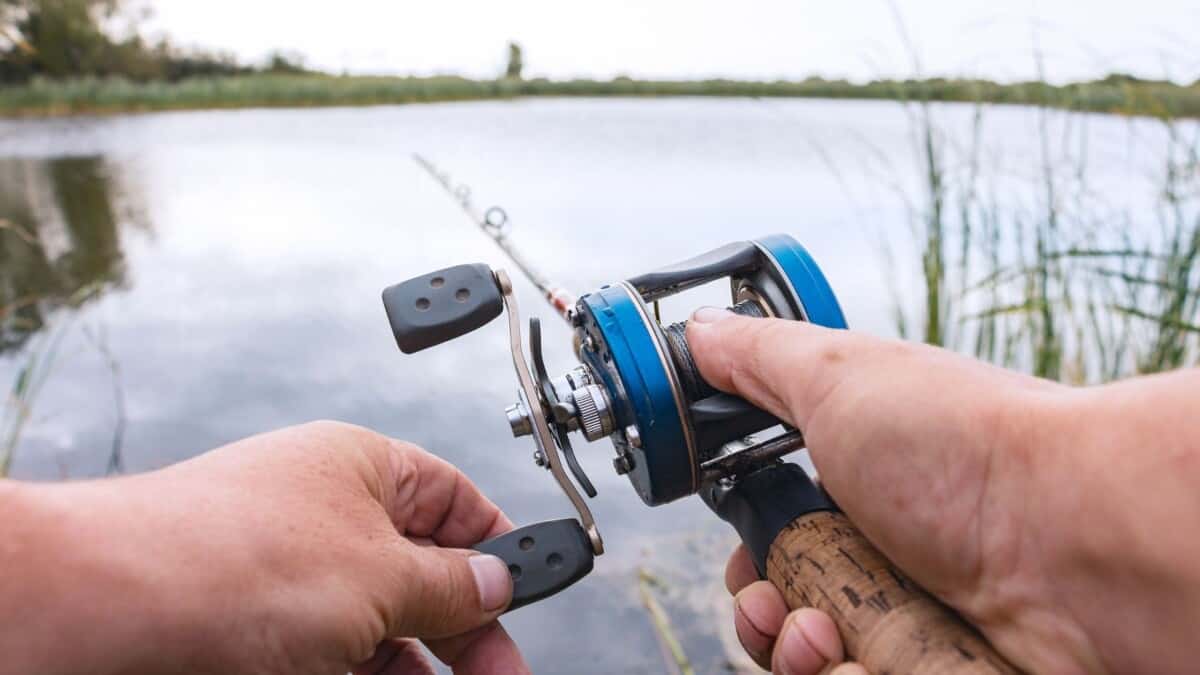
Knowing how to properly care for and maintain your fishing rod and reel is important to make your investment last many years. Your fishing rod and reel are the most vital components to catch fish, therefore, you must clean them after each use.
To clean and maintain your fishing rod and reel, you have to lightly sponge the reel with warm, soapy water, then rinse it gently, and wipe it dry. You then have to apply a lubricating protectant over the reel. Next, clean your spool and rod, and you are done! These steps may seem very easy, but to make sure you are doing it right, follow the easy steps below. This should only take about ten minutes and save you a lot of money in the long run.
A lot of fishing rods and reels can last a lifetime, handle a wider variety of fish, and can take a beating. Whether you are looking for your very first fishing rod or want to buy a new one, we’re sure that our list holds a lot of options. Read our article to discover our best fishing rods recommendations.
How to take care of your fishing rod and reel
Step 1: Clean the reel
- Tighten the drag onto your reel to prevent water contamination of the drag stack.
- Lightly sponge the reel with warm and soapy water, but do not immerse it in water and do not wash it under high pressure because this can damage it.
- Gently rinse the reel off with fresh water and wipe it dry with a clean cloth.
- Wipe the line as well. You can also remove the spool and wash it individually under fresh, running water. This will remove salt and any gunk under the spool and top reel rotor.
- Lastly, spray lubricating protectant onto a clean cloth and wipe the reel, but be careful not to wipe the line as it may deteriorate it.
Step 2: Clean the spool
- Undo the drag knob, then remove the spool by sliding it off the reel.
- Clean the spool’s underside.
- Grease the main shaft lightly before replacing the spool and drag knob.
- Leave the drag knob loose to keep the pressure off the drag washers while your reel is not in use.
- Lightly oil the handle knobs, bail arm springs, line rollers, and folding handle using high-grade reel oil. Then, wipe off any excess.
Step 3: Clean the rod
- Wash the rod with fresh water and pay attention to the guides.
- Carefully wash the grips with warm, soapy water to remove stubborn dirt.
- To prevent corrosion, use a light reel grease on the rod guides.
- Check all guides for damage, so that you can immediately replace any damaged guides because using damaged or cracked guides will cause the fishing line to break.
Occasional maintenance
- Open the side plate periodically, and lightly grease the gears and bearings. If you fish frequently, you have to do this often.
- Your reels should be serviced once every 12 months, or more often depending on their use. You can do it yourself, but if you are not confident doing so, it is best to let a professional do it for you.
Additional Tips:
- If the reel gets submerged in saltwater, soak it in freshwater several times to remove as much salt as possible. It also needs to be stripped down and serviced immediately to avoid corrosion.
- While you are cleaning your fishing rod and reel, check the line and guides for damages.
- Always store the reel with a loosened drag to allow any moisture getting in the drag to dry and prevent mold.
One of the worst things that can happen when you’re out fishing is your rod breaking. Fishing rods are flexible but they have a limit and once you surpass this limit, your rod will break. If you don’t want this to happen to you, read our article to know why fishing rods break and how to prevent it from happening.
How to set up a spinning rod and reel
Step 1: Gather your equipment
- Spinning reel
- Spinning rod
- Fishing line
- Bait/Hook
- Scissors
Step 2: Understand the important parts of your gear
-
The reel
- Spool – where the fishing line is wound around to
- Handle – when this turns, the line is forced back to the reel
- Bail – the metal arm to stop or let the line come out
- Reel foot – this connects the rod to the reel
- Drag knob – allows you to set how easily you want the line to come out
- Line roller – guides the line from the spool to the rod
-
The rod
- Rod tip – the last 4 inches of the rod and the thinnest part to help you feel when a fish bites
- Guides – circles through which the line passes to keep it close to the rod
- Reel seat – connected to the reel foot to secure the reel to the rod
- Handle – also called the “grip” and often made of soft material to make it comfortable to hold the rod
Step 3: How to connect the reel to the rod
- Loosen the rod’s reel seat, make it big enough so the reel foot can fit.
- Connect the reel foot to the reel seat.
- Tighten the reel seat.
- Repeat until sturdy.
- Make sure to tighten the reel seat.
- Repeat until sturdy.
Step 4: Spool the reel
- Open the bail.
- Put the line around the reel once. This should result in two pieces of line.
- Tie an “overhand knot” using those two pieces.
- Tie another knot using the resulting pieces of line.

- Cut the loose piece approximately ¼” away from the reel.
- Close the bail.
- Hold the line tightly, at least a foot away from the reel.
- Turn the reel until the desired amount of line is on the reel.
Step 5: String the rod
- Using one hand, grab the tip of the line.
- Open the bail arm with the other hand.
- Put the line through each rod guide, starting from the bottom to the tip.
- Remember not to let go of the line, so that it will not fall back through the guides.
There are many different types of fishing line materials on the market today, and understanding how each one works will help you have a more successful catch. The question is: how often should fishing lines be replaced? Read our article to find out!
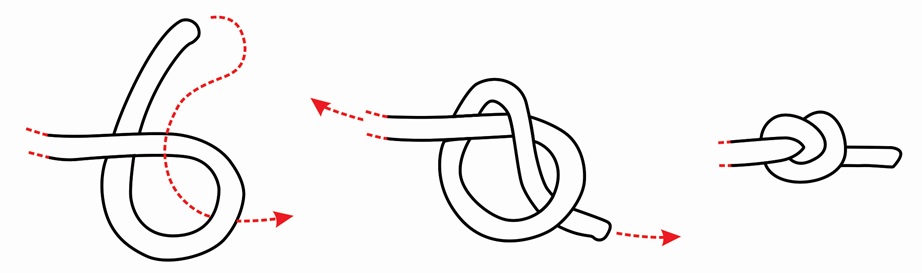
Step 6: Tie the knot
- Tie a basic fishing knot.
- Pass the line through the eye of the hook to create one piece of line on each side.
- While holding a piece in each hand, cross a piece over the other hand.
- Pass the dangling piece through the loop.
- Pull both ends of the line to tighten the knot.
- Repeat at least 3 times to make sure it doesn’t come loose.
- Cut the loose line about ¼” away from the eye of the hook and be careful not to cut the line that is connected to the rod.
Step 7: Set the drag knob
- Turn the drag knob clockwise to tighten, and counterclockwise to loosen.
- Pull the line from your reel manually to determine how the drag is affected.
- Repeat both steps until you have set it to the desired amount.
Step 8: Cast the bait
- Allow 1 to 1 ½ foot of the line to hang from the tip of the rod.
- Hold the rod a few inches above the base of the reel, and hold the line parallel to the rod.
- Open the bail with the opposite hand.
- Hold the base of the rod (using the same hand as in Step 2).
- Lean the rod backwards and away from your target.
- Swing the rod towards you quickly and release your hand (from Step 1) at the top of your cast.
Step 9: Reel in the line
- Close the bail.
- Put the line in the roller.
- Turn the reel handle.
Step 10: You can finally catch some fish!
Conclusion
A fishing rod and reel is an investment. No matter how much you paid for these equipment, it is important that you take care of them properly. Ideally, you should clean them after each use and have them professionally checked at least once a year. This may seem like too much, but we assure you that all of these is worth it in the long run.
The tips that we have shared above will help you with the task of maintaining your fishing rod and reel. As long as you follow our guide, you’ll be good to go. With just a few steps, you’ll be ensuring the longevity of your equipment which will not only save you money but allow you to enjoy fishing for a long time as well.